Back to Termination of a 08MM-QM11 on to RG11 Quad coax Product Page
Knowledge Base
Termination of a 08MM-QM11 on to RG11 Quad coax
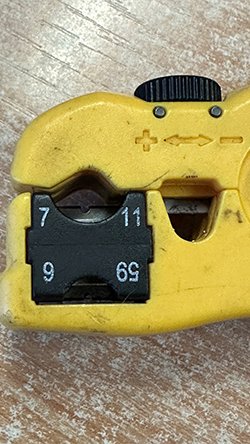
1. Use the correct tool, a Stanley knife is not acceptable as this can damage the copper on the inner conductor. Use the 08MM-ST05 and ensure 7 – 11 is on top
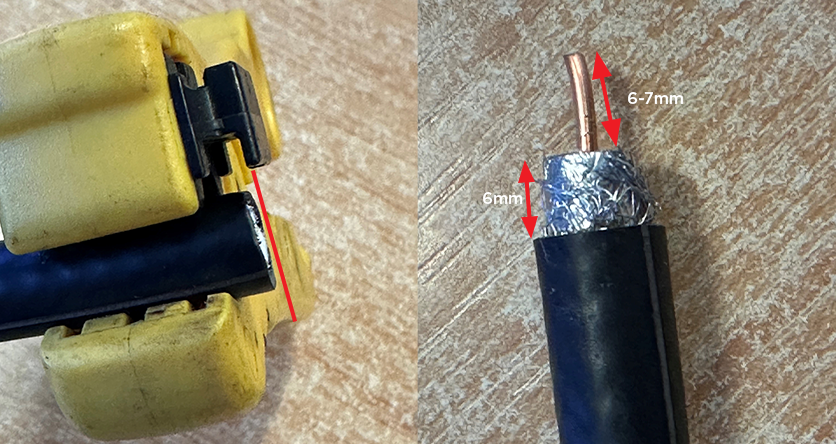
2. Place RG11Q into ST05 from left to right so the end of coax comes flush with the back of cutter inert. Place pressure on end of cutter and rotate the tool clock wise a few times and then a couple of times in reverse then clock wise again. Allow the spring of tool to maintain pressure on the coax, place thumb on left hand side of the cutter insert and push towards end of coax, this will remove the 6mm of jacket + shield + dielectric and expose 6-7mm of inner conductor.
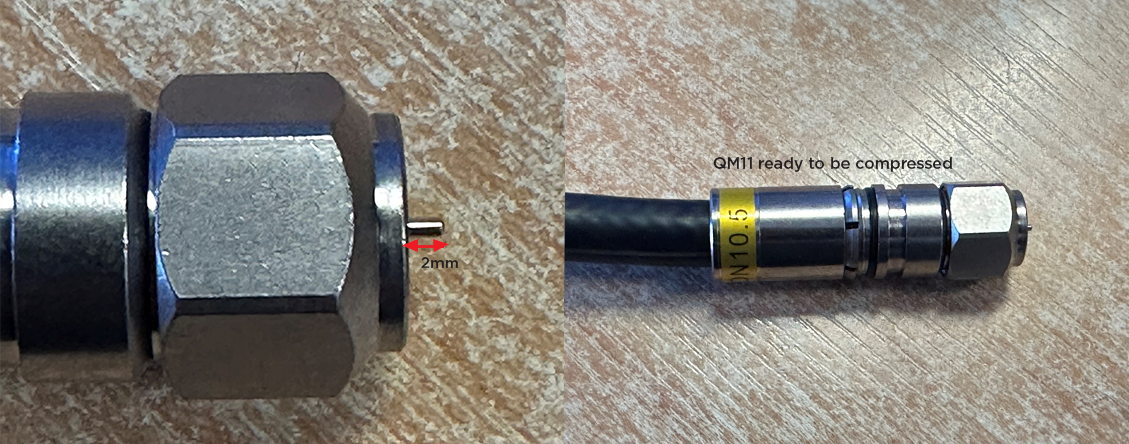
3. Push the prepared RG11Q into the 08MM-QM11 connector. The inner conductor will push into the internal integrated pin which has 4 jaws that will seize the inner conductor, continue to push the RG11Q into connector until the integrated pin protrudes by 2mm
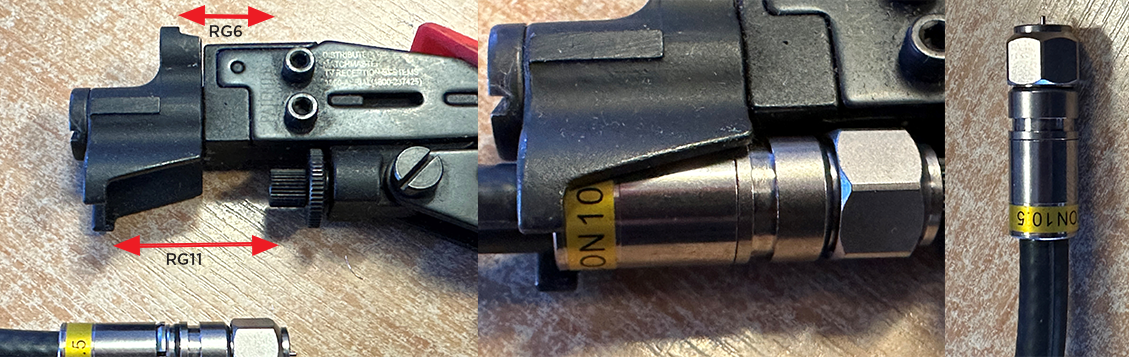
4. Using the 08MM-CT01 rotate the head to the widest gap which is for RG11, shortest for RG6. Holding tool in one hand so the handle drops down and opens the jaws, place the front of the connector into the tool and lift the coax so the back of connector fits into the front of the CT01. Lift the handle so the connector is held and you can check that the connector is safely aligned in tool. Now compress the connector.
5. When the connector is compressed the sleeve will butt up next to the front sleeve of connector as below. This should be firm but not over compressed (leads to binding of the nut) or under compressed where there is a gap. This can be adjusted on the CT01 to ensure correct compression. When using any tool some adjustment over time is required.